AUTUMN
DECEMBER 2012

November 22, 2010

ARTFUL LINDEN LEAVES

I collected 300 leaves last week, before they got wet and soggy, dry and crispy, or blown into the woodlands. I knew Mother Nature wouldn't mind me borrowing some of them. 


The Linden leaf is my absolute favorite and I love its glorious yellow color in autumn.
They are all over our kitchen island right now, sandwiched between newspaper, flattening out under piles of heavy books and magazines, in various stages of drying in preparation for our artful endeavors.


Some are ready to be painted, which is the reason I collect so many. They are a simple shape and very sturdy and take paint and varnish quite well. If varnished, they can last for years!


I put one in an altered board book two years ago!


The children painted some of the Linden leaves as their *Thankful Leaves* and will write what they are thankful for on the back with a fine tip marker. They punched a hole and tied yarn and will hang them on a branch brought inside or on a ribbon or yarn strung across a wall or mantel. 
Some leaves have designs.
We use waxed paper or parchment paper when we paint our leaves. It allows us to paint the other side even if the leaf is not fully dry, which can be very important painting with very little children :)
Sometimes the writing of children can be too large for the leaf. In that case, I encourage the children to write on a blank sticker and just stick it onto the back, or on a piece of paper that can be decoupaged on the leaf using diluted glue or mod podge. They could even draw a small picture.

We have a basket of Linden leaves all ready for our next project, to use in decorating the mantel on our stone fireplace for Christmas. We're going to paint the leaves in a multitude of reds and greens and attach them on top of the pine boughs across our mantel, as a garland.


Stay tuned for pictures  :)


               happy day!


WORDS

A quote for today . . . 


Gratitude unlocks the fullness of life.  It turns what we have into enough, and more.  It turns denial into acceptance, chaos to order, confusion to clarity.  It can turn a meal into a feast, a house into a home, a stranger into a friend.  Gratitude makes sense of our past, brings peace for today and creates a vision for tomorrow.  ~Melody Beattie

                                  happy day!

November 19, 2010

HAND MADE - Photo Challenge

It is an amazing feeling when you finish. All those hours hand-piecing and hand-quilting and you can finally step back and enjoy it on the wall, or on the bed. 
But. . .
you are extremely careful in the beginning. Are your hands shiny clean? Please don't sit ON it. Roll it down very carefully and please don't ever let it touch the floor.


But then life happens, you lighten up and forget about the many hours it took to make and now you just want to enjoy it in each way possible. 


It gets pulled off the wall when there are no more extra blankets for those college-aged quests. It gets wrapped around a body as they run out in the brisk cold to get something out of the car (and I know it got dragged in the snow!) It has even cuddled up kids while they were eating peanut butter and jelly sandwiches while watching a movie. And most recently has been a cozy abode for one of our resident felines.


It's not that I forget how long I worked on it, it just gets put into perspective. It's sort of like labor, when one swears they will never go through that again but within a short amount of time there's talk of more babies.

This quilt holds a special place in my heart because it was the last quilt I worked on with a very special quilt teacher and friend who lost her battle with cancer. 

So there's even more reason to live with this quilt, to touch ituse it, enjoy it and cherish the memories of the hard work along with the multitude of joys.


This week's photo challenge is *HAND MADE* hosted by RAZMATAZ.  
Go take a peek at other hand made photos!


                                   happy day!


{this moment}


"A Friday ritual. A single photo - no words - capturing a moment from the week. A simple, special, extraordinary moment. A moment I want to pause, savor and remember." Inspiration from SouleMama:
                                                         
                 happy day!


November 18, 2010

OUR NATURE GAME

It is a game to me, and one I like to pass on to the children, to become more knowledgeable about the plant and tree life around us, especially the ones we come in contact on a daily or weekly basis.  


As time goes on, it is no longer called a tree but becomes a Shagbark Hickory, a Grey Birch or a Red Oak . . .  not a shrub but a Winterberry, Serviceberry, or Forsytheia. You get the picture. 


The game:
~ Choose something in our natural world that we have exposure to.
~ How many of its kind can we discover as we explore?
 ~How can we describe it? Let's observe up close and use magnifying glasses and all our senses.
~ How can we draw it? Let's just draw what we see.  
~ How can we make something with it or incorporate it into our play?


This is not a game with rigid rules with a *you have to do this* kind of thing. This is just how it has come to be and it flows.


You might think this is not a game, not a fun game. Ahh but it is. The children have exposure to nature in the real world and they want to know more. It has meaning to them because all of it is part of their world. They can see, touch, hear and smell all the wonder around them.


We played a cattail game recently. We have seen them in each season, from the young new green growth which is spread in the damp soil by rhizomes, 
to the fluffy cotton the catttail turns into in order to disperse of its seeds.    
                  
First we discover all the places we find them . . . 


                                        in the pond


in the marshy earth


                        Then we look and touch and observe from all angles, using all of our senses.


And we draw what we see. You might see something different than me.


and we color in and make it our own.

 We learned that the cattail leaves are used to make woven chair seats and backs and also as rugs and mats.  The children collected some leaves and realized just how long they are.
They braided them . . . 


and made headbands, 


necklaces . . . 


and bracelets.


When we have a personal connection to something in nature, we want to know more and more and more. It has meaning for us. It is only then that we delve deeper, to learn even more about our *nature finds* in our game.


Perhaps you would enjoy this game at your house  :)


                                      happy day!


November 17, 2010

AUTUMN TREES, AUTUMN ART

The children were excited about our art activity today, but first we went out to explore real trees in the woodlands and by the pond. Most of the leaves have fallen and whole trunks and branches were quite visible to them.


There was still some color here and there.

The Autumn tree art was a hit. The children chose a light blue or dark blue cardstock paper for their background. 

Next they twisted long strips of 2 inch wide brown paper into their tree trucks and branches.  They cut the strips for the smaller branches.


We always try to use what we have and the strips of paper came from the bags that the shavings come in, that are used in the horse stalls. 

Their trees were first assembled, the way they wanted them, on paper and then glued down


They added leaves to their trees, which were scrunched up pieces of red, green, yellow and orange tissue paper.   The inspiration came from here.

                  
         AUTUMN TREE ART
                  GALLERY


I love how each tree is unique as each child is unique.

happy day!


ONE WORD WEDNESDAY


                       ~  reflection ~
(Please feel free to join in One Word Wednesday, just leave your link in the comments).

                         happy day!

November 16, 2010

KIDS, DRILLS, AND WOOD


Kids love to work with wood and after talking about safety, they made their own personal geoboards today. They use our geoboard wall all the time and I knew they would love a small one of their own, especially one they made all by themselves.
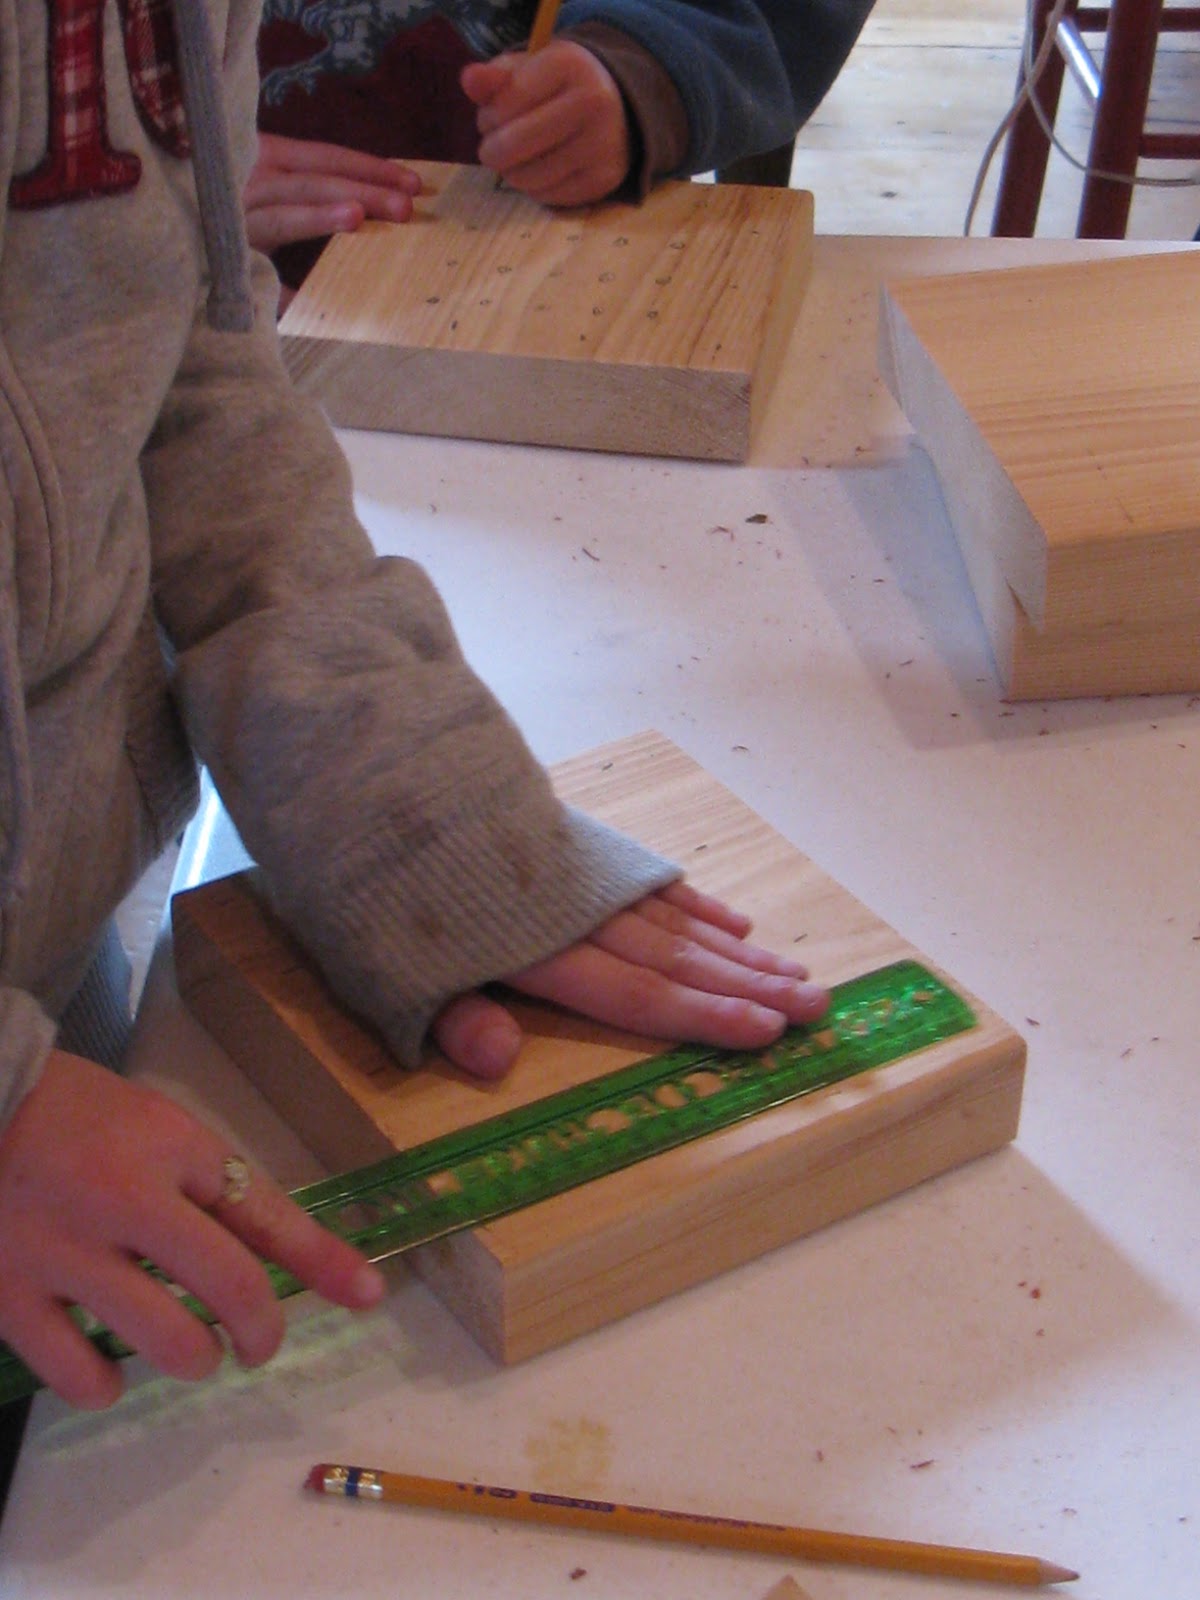
The wood was cut ahead of time, about a 6 X 6  square that was 1.25 inches thick.


 The children sanded the edges and marked the locations for the screws with a pencil.

We decided to use screws, instead of nails, so they could have practice using the power drill.  
There's so much to learn . . .  keeping it straight, applying downward pressure, pressing the trigger slowly, fitting the bit into the screw just right, reversing if it goes crooked, holding the wood, etc.


The screws were 1 1/2 inches long and were just the right length.


The children screwed them in very carefully using the power drill. 


Then it was time to add the rubber bands . . . and PLAY !

Children are such capable beings!
You may notice some screws not perfectly straight or not in a straight line, or some may be crowded in the middle of the wood. . .but all that does not matter.  


The children do not see all that. 
They see something useful and fun that they made all by themselves, the way they wanted to make it.  Here's to the children!


This would make a great gift for a child with the supplies gathered together as a KIT , for them  to make and play with once finished.  If I was making it for a gift, or if only a couple of children were making them, I would make the wood larger . . . 8 -12 inches square :)


A fun suggestion for Handmade Holiday . . . and Hands On Homeschool Blog carnival
                    
                              happy day!